Non-Destructive Testing (NDT)
- BS EN 13184:2001 Non-destructive testing. Leak testing. Pressure change process
- BS EN 13185:2001 Non-destructive testing. Leak testing. Tracer gas method
- BS EN 13192:2002 Non-destructive testing. Leak testing. Calibration of reference leaks for gases
- Levels 1 are technicians qualified to perform only specific calibrations and tests under close supervision and direction by higher level personnel. They can only report test results. Normally they work following specific work instructions for testing procedures and rejection criteria.
- Level 2 are engineers or experienced technicians who are able to set up and calibrate testing equipment, conduct the inspection according to codes and standards (instead of following work instructions) and compile work instructions for Level 1 technicians. They are also authorized to report, interpret, evaluate and document testing results. They can also supervise and train Level 1 technicians. In addition to testing methods, they must be familiar with applicable codes and standards and have some knowledge of the manufacture and service of tested products.
- Level 3 are usually specialized engineers or very experienced technicians. They can establish NDT techniques and procedures and interpret codes and standards. They also direct NDT laboratories and have central role in personnel certification. They are expected to have wider knowledge covering materials, fabrication and product technology.
Nondestructive testing or Non-Destructive Testing (NDT) is a wide group of analysis techniques used in science and industry to evaluate the properties of a material, component or system without causing damage. The terms Nondestructive examination (NDE), Nondestructive inspection (NDI), and Nondestructive evaluation (NDE) are also commonly used to describe this technology. Because NDT does not permanently alter the article being inspected, it is a highly valuable technique that can save both money and time in product evaluation, troubleshooting, and research. Common NDT methods include ultrasonic, magnetic-particle, liquid penetrant, radiographic, remote visual inspection (RVI),eddy-current testing,[1] and low coherence interferometry. NDT is commonly used in forensic engineering, mechanical engineering, petroleum engineering, electrical engineering, civil engineering, systems engineering, aeronautical engineering, medicine, and art. Innovations in the field of nondestructive testing have had a profound impact on medical imaging, including on echocardiography, medical ultrasonography, and digital radiography.
Methods
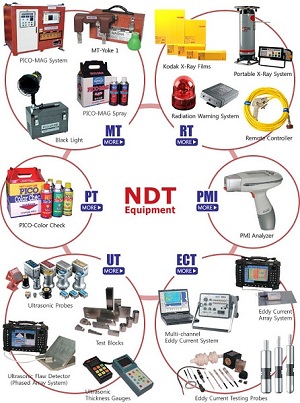 NDT methods may rely upon use of electromagnetic radiation, sound, and inherent properties of materials to examine samples. This includes some kinds of microscopy to examine external surfaces in detail, although sample preparation techniques for metallography, optical microscopy and electron microscopy are generally destructive as the surfaces must be made smooth through polishing or the sample must be electron transparent in thickness. The inside of a sample can be examined with penetrating radiation, such as X-rays, neutrons or terahertz radiation. Sound waves are utilized in the case of ultrasonic testing. Contrast between a defect and the bulk of the sample may be enhanced for visual examination by the unaided eye by using liquids to penetrate fatigue cracks. One method (liquid penetrant testing) involves using dyes, fluorescent or non-fluorescent, in fluids for non-magnetic materials, usually metals. Another commonly used NDT method used on ferrous materials involves the application of fine iron particles (either liquid or dry dust) that are applied to a part while it is in an externally magnetized state (magnetic-particle testing). The particles will be attracted to leakage fields within the test object, and form on the objects surface. Magnetic particle testing can reveal surface & some sub-surface defects within the part. Thermoelectric effect (or use of the Seebeck effect) uses thermal properties of an alloy to quickly and easily characterize many alloys. The chemical test, or chemical spot test method, utilizes application of sensitive chemicals that can indicate the presence of individual alloying elements. Electrochemical methods, such as electrochemical fatigue crack sensors, utilize the tendency of metal structural material to oxidize readily in order to detect progressive damage. Tendency of metal structural material to oxidize readily in order to detect progressive damage.
Applications
NDT is used in a variety of settings that covers a wide range of industrial activity, with new NDT methods and applications, being continuously developed. Non-destructive testing methods are routinely applied in industries where a failure of a component would cause significant hazard or economic loss, such as in transportation, pressure vessels, building structures, piping, and hoisting equipment.
Methods and techniques
Radiographic Testing
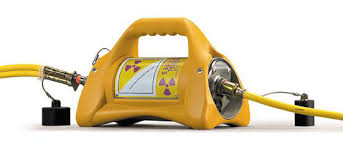 Radiographic Testing (RT), or industrial radiography, is a nondestructive testing(NDT) method of inspecting materials for hidden flaws by using the ability of short wavelength electromagnetic radiation (high energy photons) to penetrate various materials.
 Either an X-ray machine or a radioactive source, like Ir-192, Co-60, or in rarer casesCs-137 are used in a X-ray computed tomography machine as a source of photons. Neutron (NR) is a variant of radiographic testing which uses neutrons instead of photons to penetrate materials. This can see very different things from X-rays, because neutrons can pass with ease through lead and steel but are stopped by plastics, water and oils.
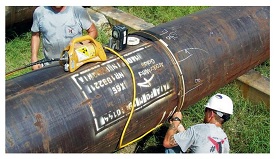 Most industries are moving from film based radiography to digital sensor based radiography much the same way that traditional photography has made this move.Since the amount of radiation emerging from the opposite side of the material can be detected and measured, variations in this amount (or intensity) of radiation are used to determine thickness or composition of material. Penetrating radiations are those restricted to that part of the electromagnetic spectrum of wavelength less than about 10 nanometers.
Magnetic particle Inspection (MPI)
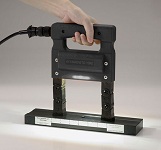 Magnetic particle Inspection (MPI) is a non-destructive testing (NDT) process for detecting surface and slightly subsurface discontinuities in ferromagnetic materials such as iron, nickel, cobalt, and some of their alloys. The process puts a magnetic field into the part. The piece can be magnetized by direct or indirect magnetization. Direct magnetization occurs when the electric current is passed through the test object and a magnetic field is formed in the material. Indirect magnetization occurs when no electric current is passed through the test object, but a magnetic field is applied from an outside source. The magnetic lines of force are perpendicular to the direction of the electric current, which may be either alternating (AC) or some form of direct current (DC) (rectified AC).
A technician performs MPI on a pipeline to check for stress corrosion cracking using what is known as the "black and white" method. No indications of cracking appear in this picture; the only marks are the "footprints" of the magnetic yoke and drip marks.
 A close-up of the surface of a (different) pipeline showing indications of stress corrosion cracking (two clusters of small black lines) revealed by magnetic particle inspection. Cracks that would normally have been invisible are detectable due to the magnetic particles clustering at the crack openings. The scale at the bottom is numbered in centimeters.
The presence of a surface or subsurface discontinuity in the material allows the magnetic flux to leak, since air cannot support as much magnetic field per unit volume as metals. Ferrous particles are then applied to the part. The particles may be dry or in a wet suspension. If an area of flux leakage is present, the particles will be attracted to this area. The particles will build up at the area of leakage and form what is known as an indication. The indication can then be evaluated to determine what it is, what may have caused it, and what action should be taken, if any.
Leak testing
Containers, vessels, enclosures, or other fluid system are sometimes tested for leaks - to see if there is any leakage and to find where the leaks are so corrective action can be taken. There are several methods for leak testing, depending on the situation. Sometimes leakage of fluid may make a sound which can be detected. Tires, engine radiators, and maybe some other smaller vessels may be tested by pressurizing them with air and submerging them in water to see where air bubbles come out to indicate a leak. If submerging in water is not possible, then pressurization with air followed by covering the area to be tested with a soap solution is done to see if soap bubbles form, which indicate a leak. Other types of testing for gas leaks may involve testing for the out leaking gases with sensors which can detect that gas, for example - special sensing instruments for detecting natural gas. U.S. federal safety law now requires natural gas companies to conduct testing for gas leaks upstream of their customer's gas meters. Where liquids are used, special color dyes may be added to help see the leakage. Other detectable substances in one of the liquids may be tested, such as saline to find a leak in a sea water system, or detectable substances may even be deliberately added to test for leakage.
Newly constructed, fabricated or repaired systems or other vessels are sometimes tested to verify satisfactory production or repair. Plumbers often test for leaks after working on water or other fluid system. A vessel or system is sometimes pressure tested by filling with air and the pressure monitored to see if it drops, indicating a leak. A very commonly used test after new construction or repair is a hydrostatic test, sometimes called a pressure test. In a hydrostatic test, a system is pressurized with water to look for a drop in pressure or to see where it leaks out. Helium testing may be done to detect for any very small leakage such as when testing certain diaphragm or bellows valves, made for high purity and ultra high purity service, requiring low leak rate capability. Helium and hydrogen have very small molecules which can go through very small leaks.
Leak testing is part of the non-destructive test NDT portfolio that can be applied to a part to verify its conformity; depending on material, pressure, leak tightness specifications, different methods can be applied. International standards have been defined to assist in these choices. For example, BS EN 1779:1999; it applies to assessment of leak tightness by indication or measurement of gas leakage, but excludes hydrostatic, ultrasonic or electromagnetic methods. Other standards also apply:
In shell and tube heat exchangers, Eddy current testing is sometimes done in the tubes to find locations on tubes where there may be leaks or damage which may eventually develop into a leak.
Ultrasonic testing (UT)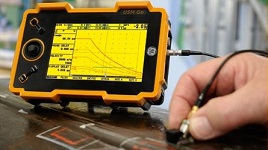 Ultrasonic testing (UT) is a family of non-destructive testing techniques based on the propagation of ultrasonic waves in the object or material tested.
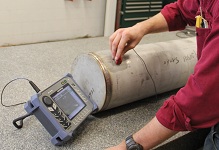 In most common UT applications, very short ultrasonic pulse-waves with center frequencies ranging from 0.1-15 MHz, and occasionally up to 50 MHz, are transmitted into materials to detect internal flaws or to characterize materials. A common example is ultrasonic, which tests the thickness of the test object, for example, to monitor pipe work corrosion.
Ultrasonic testing is often performed on steel and other metals and alloys, though it can also be used on concrete, wood and composites, albeit with less resolution. It is used in many industries including steel and aluminum construction, metallurgy, manufacturing, aerospace, automotive and other transportation sectors.
Penetrant testing (PT) Dye penetrant inspection (DPI), also called liquid penetrant inspection(LPI) or penetrant testing (PT), is a widely applied and low-cost inspection method used to locate surface-breaking defects in all non-porous materials (metals, plastics, or ceramics). The penetrant may be applied to all non-ferrous materials and ferrous materials; although for ferrous components magnetic-particle inspection is often used instead for its subsurface detection capability. LPI is used to detect casting, forging and welding surface defects such as hairline cracks, surface porosity, leaks in new products, and fatigue cracks on in-service components.
Levels of certification
Most NDT personnel certification schemes listed above specify three "levels" of qualification and/or certification, usually designated as Level 1, Level 2 and Level 3 (although some codes specify Roman numerals, like Level II). The roles and responsibilities of personnel in each level are generally as follows (there are slight differences or variations between different codes and standards):
Terminology
The standard US terminology for Nondestructive testing is defined in standard ASTM E-1316. Some definitions may be different in European standard EN 1330.
Indication
The response or evidence from an examination, such as a blip on the screen of an instrument. Indications are classified as true or false. False indications are those caused by factors not related to the principles of the testing method or by improper implementation of the method, like film damage in radiography, electrical interference in ultrasonic testing etc.True indications are further classified as relevant and non relevant. Relevant indications are those caused by flaws. Non relevant indications are those caused by known features of the tested object, like gaps, threads, case hardening etc.
Interpretation
Determining if an indication is of a type to be investigated. For example, in electromagnetic testing, indications from metal loss are considered flaws because they should usually be investigated, but indications due to variations in the material properties may be harmless and no relevant.
Flaw
A type of discontinuity that must be investigated to see if it is rejectable. For example, porosity in a weld or metal loss.
Evaluation
Determining if a flaw is rejectable. For example, is porosity in a weld larger than acceptable by code?
Defect
A flaw that is rejectable — i.e. does not meet acceptance criteria. Defects are generally removed or repaired.

